Doraemon has always been my all-time favorite, and I remember watching it every day after school. Its storyline is so addictive that once you start watching it, you’ll definitely want to see more. Since childhood, I have been fascinated by Doraemon and other cartoons, which made me curious about how they were created. This curiosity led me to start learning how to draw on my own.
Currently, I am still improving my drawing skills, but they are good enough for me to teach other kids who want a step-by-step drawing tutorial for Doraemon.
This drawing tutorial is designed specifically for kids, which is why the sketch is kept very simple and basic, making it easy for them to follow and learn.
How To Draw Doraemon Step By Step For Kids
Follow the steps and soon you will be drawing Doraemon by yourself.
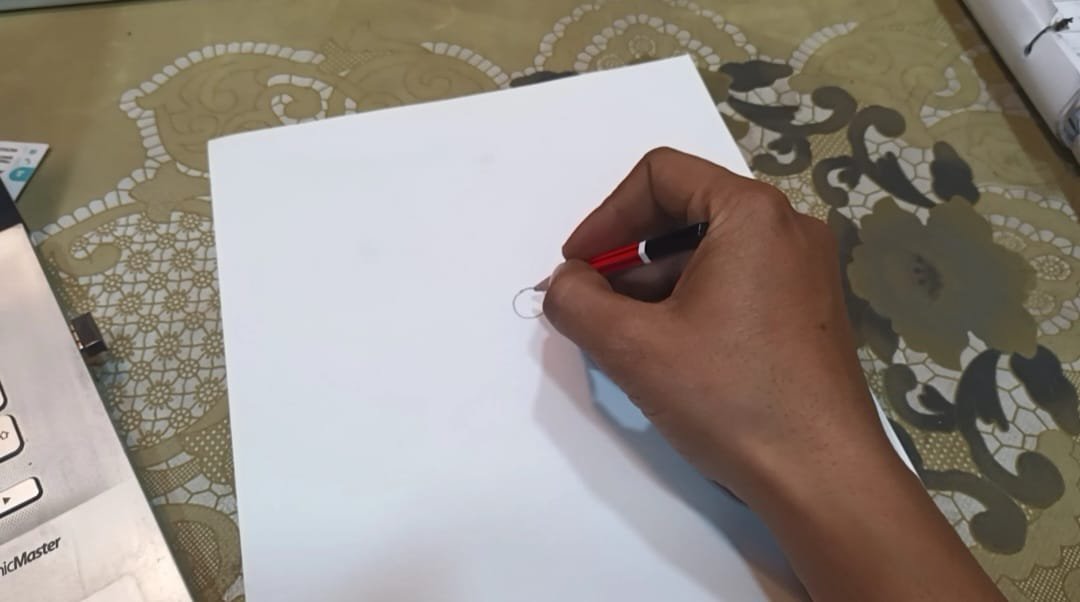
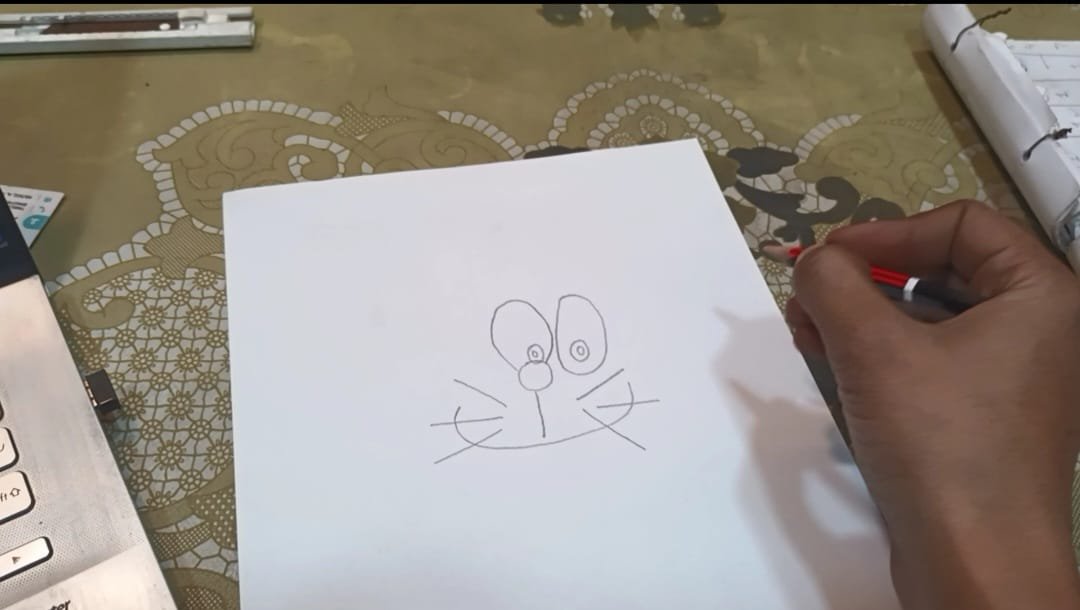
Step 1.
Let’s start by drawing Doraemon’s nose. To do this, simply draw a small circle in the middle of the sheet.
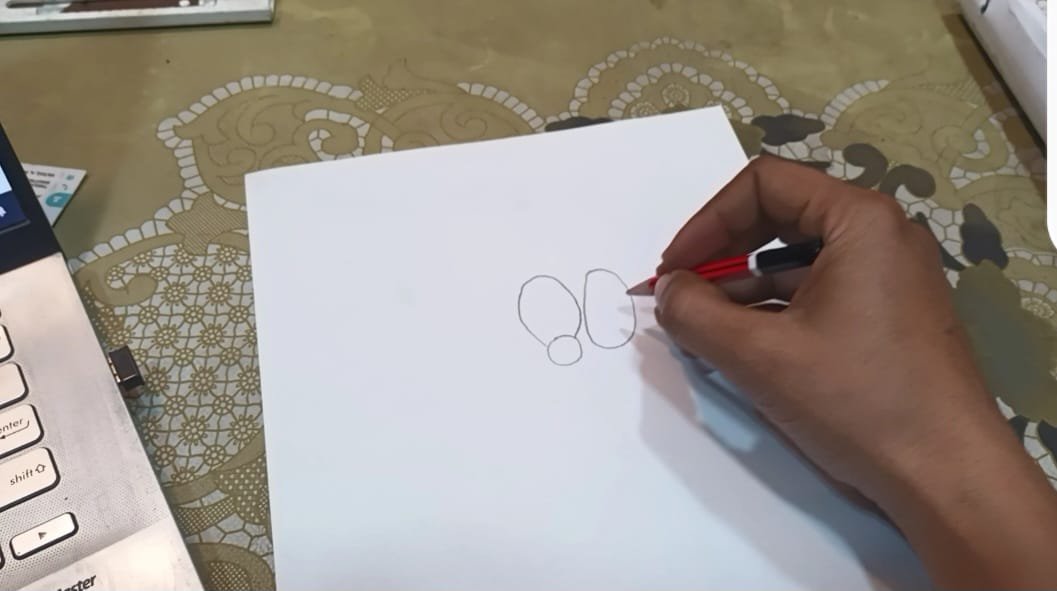
Step 2.
Now, let’s add the eyes. Draw two oval shapes near the nose you made in the first step. It’s okay if they aren’t perfect; you can always use an eraser to adjust them later.
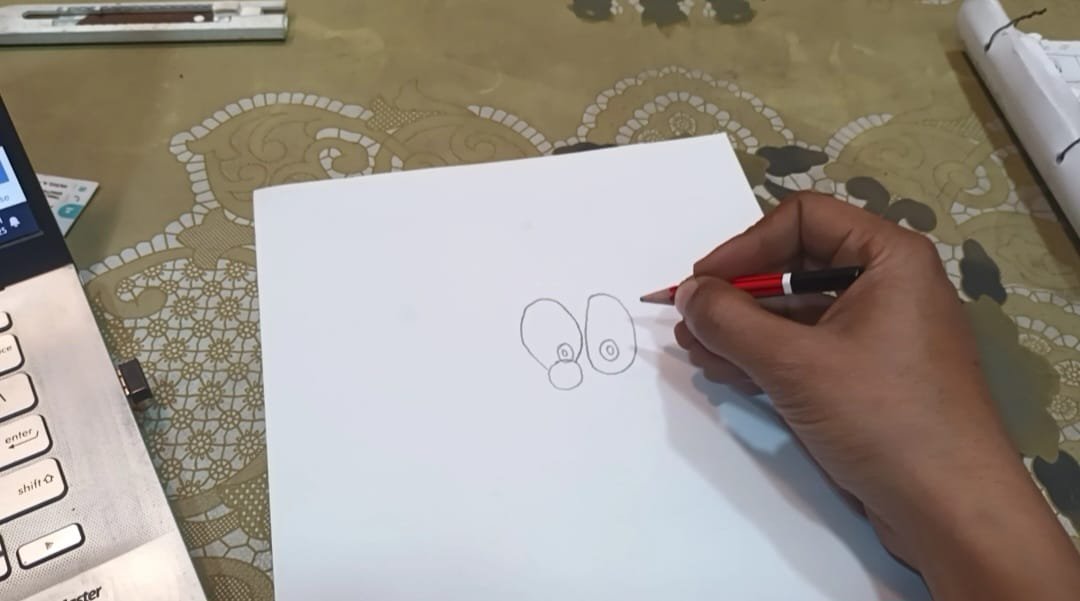
Step 3.
After drawing the outline of the eyes, let’s add some details. Draw two small circles inside each eye, and then add two even smaller circles inside them. I hope everything has been easy to follow so far!
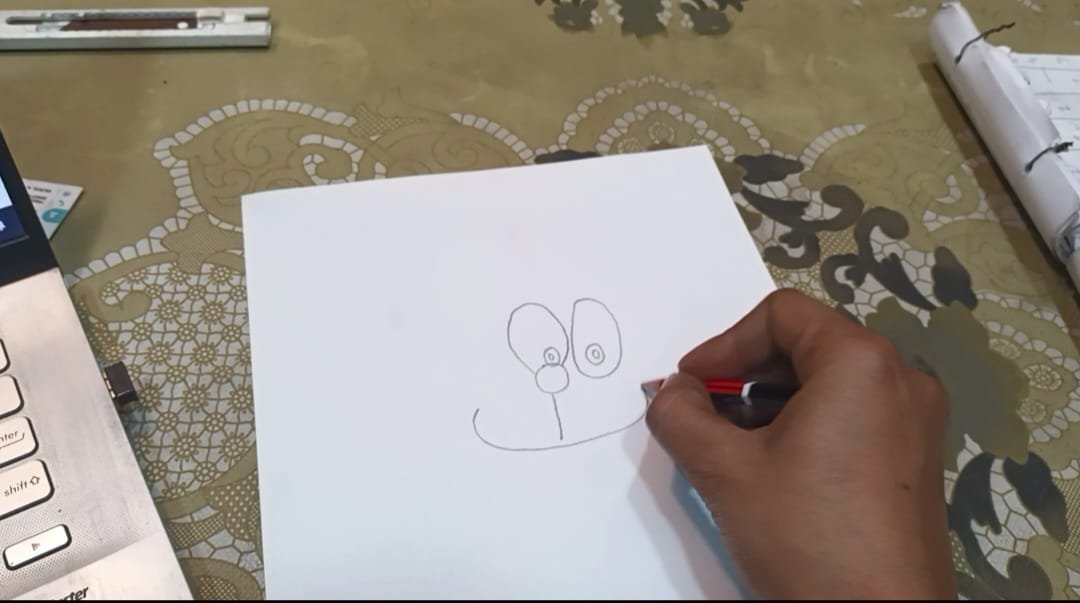
Step 4.
You now have the nose and eyes—believe me, that’s a great start! Now, let’s draw Doraemon’s mouth. Simply draw a small straight line extending downward from the nose. Once you’re satisfied with the length, add a big smile that connects to the line.
Your drawing is coming to life, and people will definitely be able to recognize that it’s Doraemon!
Step 5:
Add three whiskers on each side of Doraemon’s face. This step is the simplest of all! Just draw three straight lines extending outward from both sides of the face.
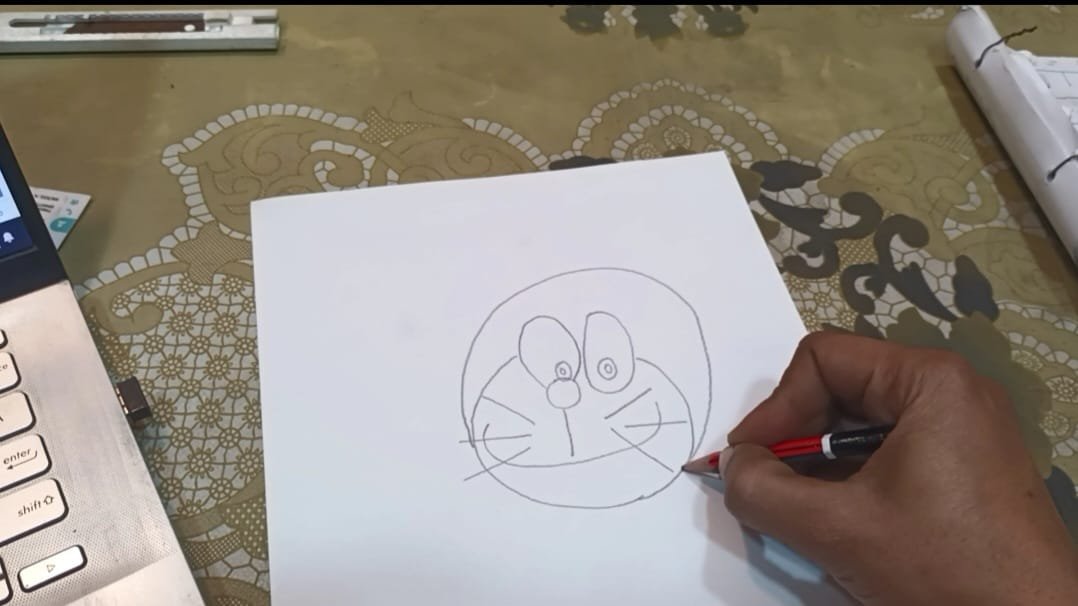
Step 6.
After adding the whiskers, it’s time to complete Doraemon’s face. We’ll do this in two steps.
In the first step, draw a rough circle starting from the middle of the eyes, extending downward to cover the big smile and whiskers. This will form the basic outline of Doraemon’s face.

Step 7.
After completing the previous step, we will now add a half-circle that overlaps the circle we drew in Step 6. Don’t worry about making it perfect—we can adjust it later. This half-circle will serve as the outline for Doraemon’s head.
With this step, your Doraemon drawing is truly coming to life!
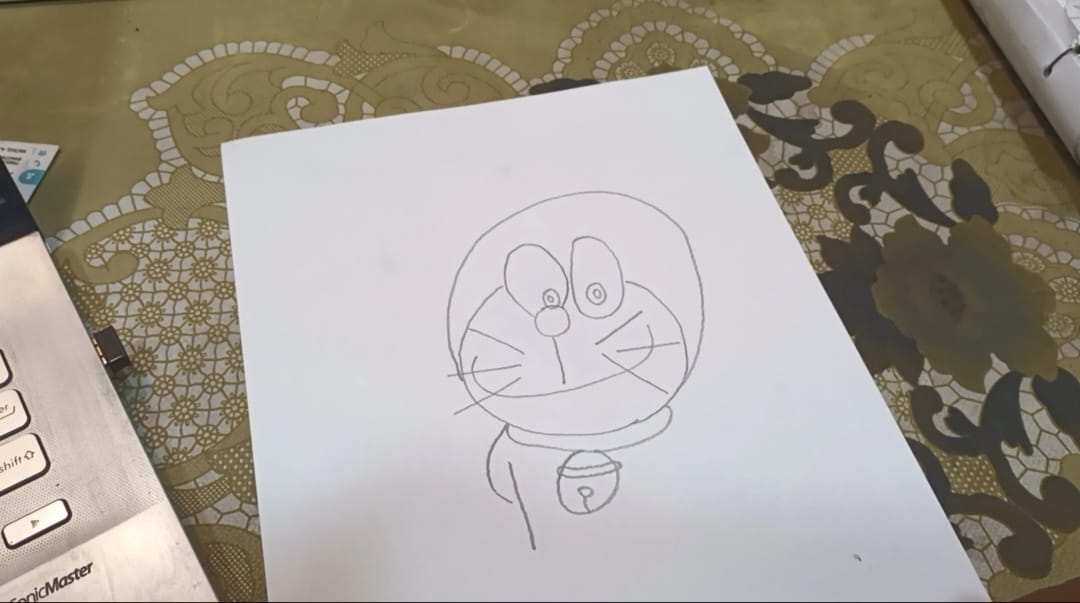
Step 8.
In this step, we will add Doraemon’s bell, which is always present on his neck.
To do this, draw two parallel curved lines below the neck to form the collar. Then, draw a circle below these lines to represent the bell.
To give the bell more detail, draw two parallel curved lines inside the circle. Below the bell, add a small circle and connect it to the circumference with a short line. This will complete the bell, making it look perfect!

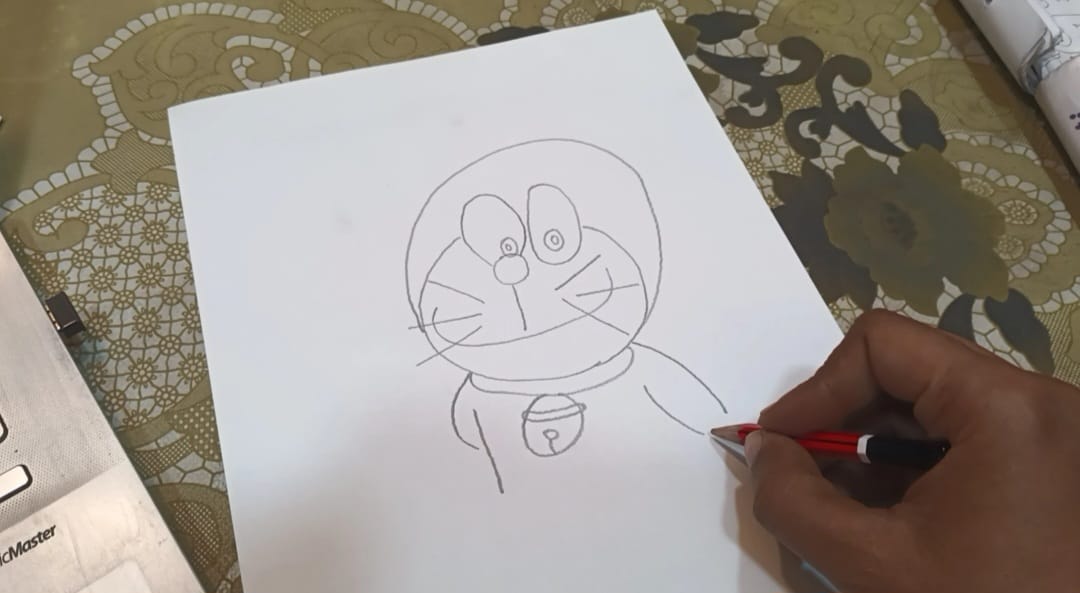
Step 9.
Let’s start drawing Doraemon’s body. These steps are tricky and need to be done carefully.
To create the body, begin on the left side by drawing a small line as the body outline. Then, extend it into a “C” shape—this will form Doraemon’s hand. Take your time with this step to get the right shape!
Step 10.
Now, let’s create the other side of Doraemon’s body. For this, draw an inverted “C” followed by a regular “C” shape. Once you have these two “C” shapes, leave them as they are and add a circle at the end to form Doraemon’s hand.
Take your time with this step—you’re almost there!
Step 11.
After completing both of Doraemon’s hands, it’s time to draw the legs.
To do this, start from the middle of one hand and draw a curved line downward. Pause and add a small circle—this will act as the first leg. Then, draw a small dash next to it and add another small circle to form the second leg.
Now, Doraemon has both legs, and your drawing is almost complete!
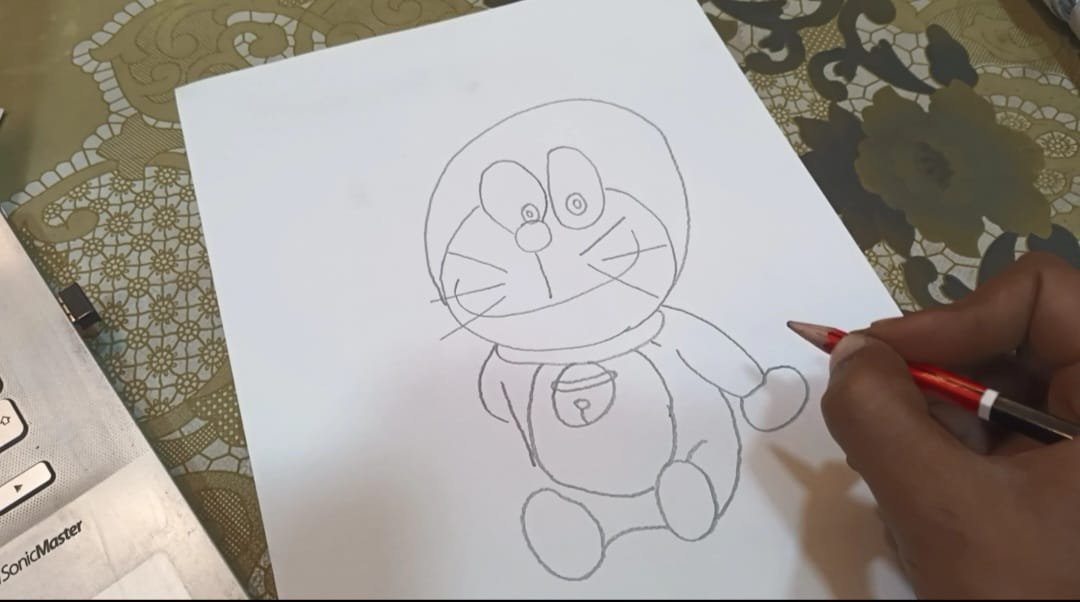
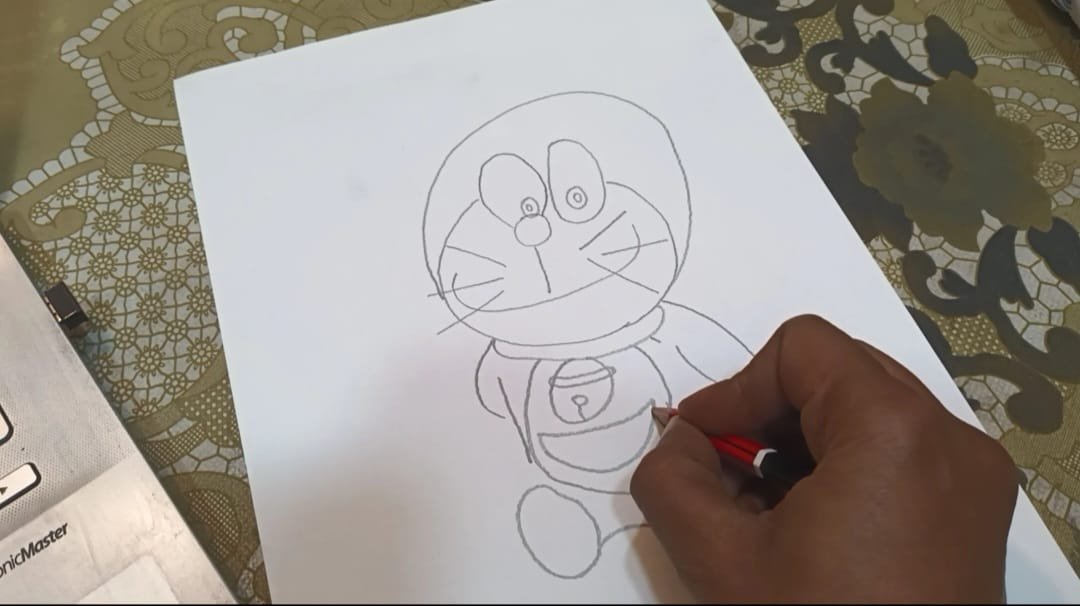
Step 12.
In the final step, we will add Doraemon’s magical pocket and connect any remaining open spaces in the drawing.
To draw the pocket, simply make a small curved rectangle in the middle of Doraemon’s belly. Then, connect any gaps in the sketch to complete the outline.
At this stage, you can also refine your drawing by erasing any unnecessary lines and making adjustments to improve the overall shape. With these final touches, your Doraemon sketch is complete!
Doraemon Coloring Pages


